Renaming a Swift project using Xcode and Emacs
You may need to rename a project to better reflect the app’s evolved feature set, e.g., from LiveTranscribeJP to OmniScribe. Here is how to apply this rename to your codebase.
Step 1: Update the Name throughout the Codebase
In Emacs, you can use projectile-ripgrep or projectile-replace to find and
replace the name tokens. Do this only to those in the source code files, and
skip files associated with project management.
Step 2: Perform the Project Rename in Xcode
To fully rename the app (including the icon name on the dock and the file structure), follow these steps in Xcode:
-
Rename Project:
- In the Project Navigator (left sidebar), click on the blue project icon LiveTranscribeJP.
- Press Enter to rename it. Type OmniScribe and press Enter.
- Xcode will ask to rename targets and schemes. Click Rename.
-
Rename the source folder:
- In the Project Navigator (left sidebar), click on the source folder icon LiveTranscribeJP.
- Press Enter to rename it. Type OmniScribe and press Enter.
-
Rename Scheme:
- Click the scheme selector (top bar, next to the Play button).
-
Select Manage Schemes….
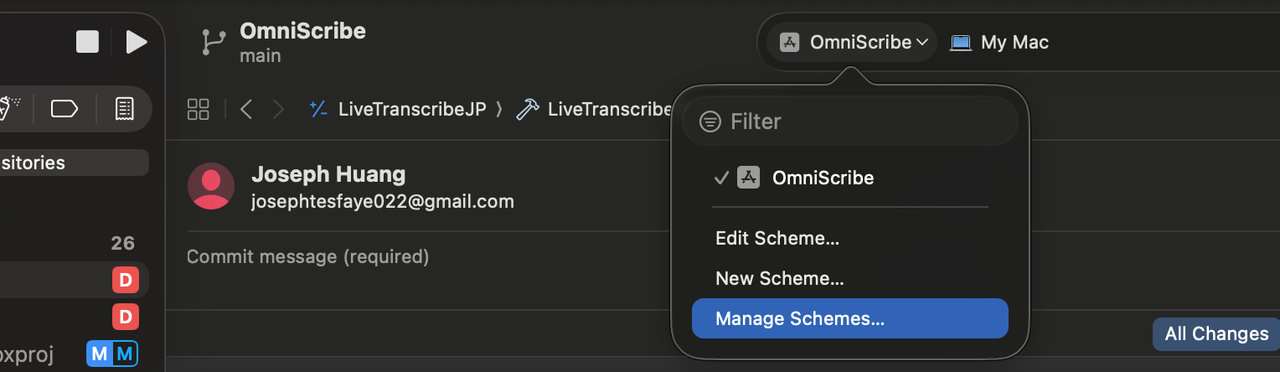
- Select LiveTranscribeJP, press Enter or click on it, and rename it to OmniScribe.
-
Update Bundle Identifier (Optional):
- Click the Project icon -> Select the Target -> Signing & Capabilities.
- Change
Bundle Identifiertocom.yourname.OmniScribe.
-
Update Info.plist:
If you see
Bundle nameorBundle display namein yourInfo.plist, ensure they use$(PRODUCT_NAME)or are manually updated to OmniScribe. -
Update Info.plist path in Build Settings:
-
Open Project Settings: Click on the blue project icon (now named OmniScribe) in the left Project Navigator.
-
Select the Target: In the center panel, select the OmniScribe target (under "Targets").
-
Go to Build Settings: Click the Build Settings tab at the top.
-
Search for Info.plist: Type Info.plist in the search bar (top right of the settings list).
-
Update "Info.plist File":
- Locate the row named
Info.plist File(Key:INFOPLIST_FILE). - Double-click the value on the right.
- Change the path to point to the correct location of your file.
- Locate the row named
If this path isn't set correctly you may see this error:
Build input file cannot be found: ‘/path/to/LiveTranscribeJP/Info.plist’. Did you forget to declare this file as an output of a script phase or custom build rule which produces it?
-
Comments