
Sharing one keyboard and mouse across multiple devices using Barrier
If you have more than one computers you may want to use just one set of keyboard and mouse for all the computers. I’m not talking about using multiple screens, albeit similar to what I’m going to talk about to some extent. I’m talking about using multiple computers, or devices which have their own monitors, motherboards, OS-es, and keyboards and mice. If you are in this situation it’s natural to think that it would be very nice if you can control all of them with just one keyboard and one mouse, instead of cramming your workspace with many keyboards and mice. There are many ways to achieve this. There are hardware ways such as using a KVM switch, and there are software ways such as using Barrier.
Barrier is an open-source tool that supports all kinds of OS-es. Check out these articles for more details about it:
- Share input devices between computers with Barrier
- How To Use Single Mouse And Keyboard on Multiple Computers
It’s supposedly easy to install and use Barrier and the official repository doesn’t provide a detailed tutorial. But in reality when I installed it for myself there were several pitfalls that caught me and I think it might be helpful for others to write them down.
Without further ado let’s get into the process of my installation.
- Download Barrier from its Github releases. The version I downloaded is BarrierSetup-2.4.0-release.exe. My OS-es were Windows 10 Pro.
- Install the downloaded package. Follow the instructions on the screen.
- Repeat the process on another computer which is to be connected.
- Run Barrier on both computers.
When I started Barrier (version: 2.4.0-release-3e0d758b) I saw this error in the log:
[2023-01-25T23:40:29] ERROR: ssl certificate doesn't exist: C:\Users\josep\AppData\Local\Barrier\SSL\Barrier.pem
It seems because the file “Barrier.pem” was missing. According to these comments, #1377, #231, the following steps should fix the problem:
- Install Git for windows
cdintoC:\Users\<user>\AppData\Local\Barrier\SSL\- Run in the console
openssl req -x509 -nodes -days 365 -subj /CN=Barrier -newkey rsa:4096 -keyout Barrier.pem -out Barrier.pem - Restart barrier
After the 3rd step a file named “Barrier.pem” was generated. But then after clicking “Reload” on Barrier although the former error was gone, a new error occurred as shown in the log:
[2023-01-25T23:51:15] INFO: OpenSSL 1.0.2l  25 May 2017
[2023-01-25T23:51:15] ERROR: could not use ssl certificate: C:\Users\josep\AppData\Local\Barrier\SSL\Barrier.pem
[2023-01-25T23:51:15] ERROR: error:0906D06C:PEM routines:PEM_read_bio:no start line
[2023-01-25T23:51:31] INFO: OpenSSL 1.0.2l  25 May 2017
[2023-01-25T23:51:31] ERROR: could not use ssl certificate: C:\Users\josep\AppData\Local\Barrier\SSL\Barrier.pem
[2023-01-25T23:51:31] ERROR: error:140AD009:SSL routines:SSL_CTX_use_certificate_file:PEM lib
Restarting Barrier was of no avail at this point (log).
So actually in the 3rd step the command produced an error which I missed:
$ openssl req -x509 -nodes -days 365 -subj /CN=Barrier -newkey rsa:4096 -keyout Barrier.pem -out Barrier.pem
Generating a RSA private key
........................++++
..............................................................................++++
writing new private key to 'Barrier.pem'
-----
name is expected to be in the format /type0=value0/type1=value1/type2=... where characters may be escaped by \. This name is not in that format: 'C:/Program Files/Git/CN=Barrier'
problems making Certificate Request
This is because the character “/” is treated as the root path of Git
Bash. You can set the environment variable MSYS_NO_PATHCONV to 1 to fix the problem
(ref.
1
2).
So run in step 3 instead:
MSYS_NO_PATHCONV=1 openssl req -x509 -nodes -days 365 -subj /CN=Barrier -newkey rsa:4096 -keyout Barrier.pem -out Barrier.pem
It didn’t produce an error. Now after reloading Barrier no error occurred.
Then I added the client name to the server configuration in order for it to be allowed to connect. On the server side click “Configure Server…” button and then add a new screen with the client name to the screen grid.
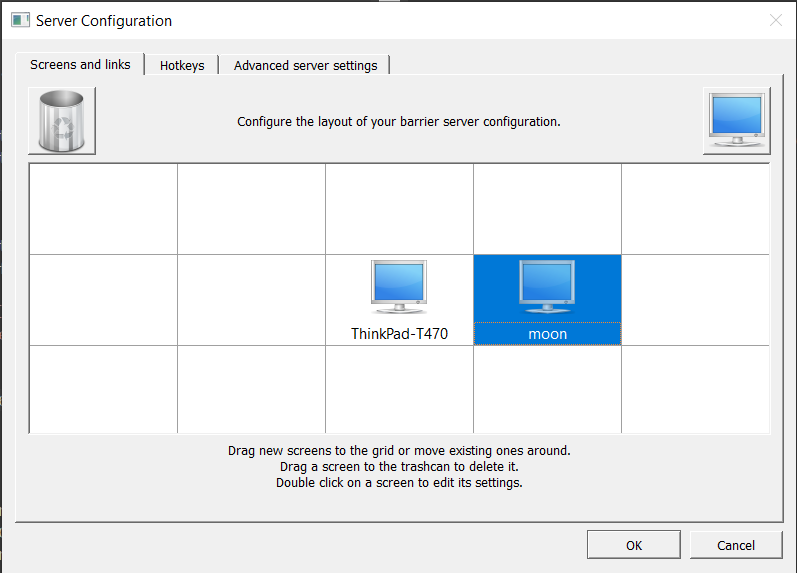
The connection was successful.
Now it’s time to move the cursor around to see if everything worked as expected. Then I bumped into the problem that the cursor got stuck at the bottom right corner of the client screen. After a bit of researching I found it’s due to the mishandling of the scaling of the screens by the version of Barrier I installed (ref. #678 #698). My server computer screen was scaled to 125% and the client computer had a default scale but a portait orientation. After changing the server scale to 100% the problem was gone.
But I need a solution without changing the scales. According to this comment on #698 I downloaded the latest build (version: 2.4.0-release-a19101b1) from Barrier’s Azure pipeline and reinstalled Barrier on both computers. Reinstalling only on the server was enough to fix the problem but it’s better to keep them in sync.
Now I could move freely between the computers by simply moving the cursor to the edge of the screen.
I made several other configurations afterwards:
Enabling all dead Corners under Configure Server… > Advanced server settings > Dead corners. Corner size 75. This is to prevent screen switching when you reach the corners of the server screen.
Uncheck “Synchronize screen savers”. This option was enabled by default. It may keep the client from sleeping or turning off the screen.

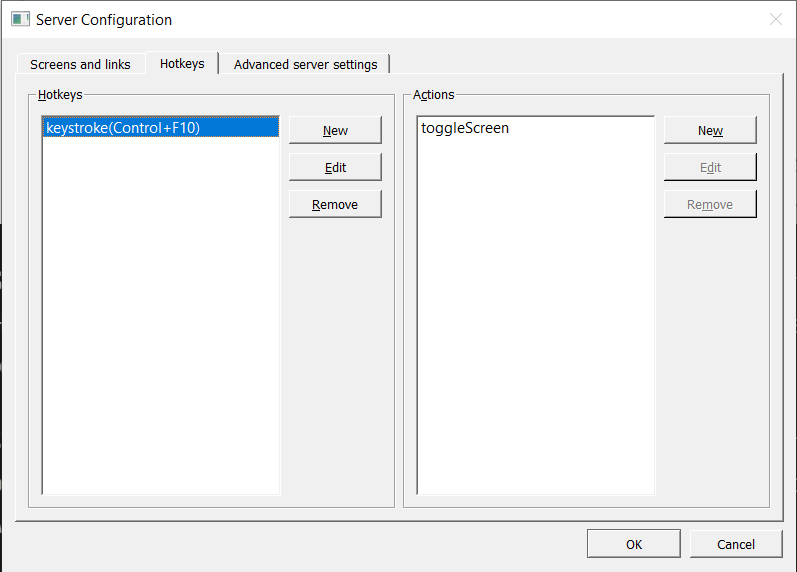
Setting up keyboard shortcut keys for switching screens: Under Configure Server… > Hotkeys, add new hotkeys and their corresponding actions. After saving you need to reload the server to see them take effect.
Since I preferred to use the super key (i.e. the Windows logo key on Windows) in the key-bindings, when I added the keys it couldn’t be captured. See this comment on #1073. The workaround is to edit the configuration file:
-
Set up a key-binding without the super key, e.g.
C-M-]. -
Click Barrier > Save configuration to save the configuration to a file. For example, this is the configuration of connecting my ThinkPad with the other PC called moon.
-
Edit the file and change the key-binding to include the super key, e.g.
keystroke(Control+Alt+]) = toggleScreen ↓ keystroke(Super+n) = toggleScreen -
Select “Use existing configuration” and point to the file.
-
Click Reload.
Now I had set the shortcut key for switching back and forth between the
screens as Win-n successfully. However, there was a new problem - when
I pressed Win-n on the client it would open the Start menu, which is a
bit annoying. So I ended up using another key-binding C-F10.
Comments