Built-in TTS for Japanese on macOS
macOS (Tahoe 26.2 as of writing) has a robust, built-in Text-to-Speech (TTS) system that supports high-quality Japanese voices. You can use this through the graphical interface or via the Terminal.
How to Enable Japanese Voices
By default, your Mac may only have English voices downloaded. You can add Japanese voices through System Settings:
-
Open the Apple menu > System Settings.
-
Navigate to Accessibility > Spoken Content (or Read & Speak in newer versions like Sonoma/Sequoia).
-
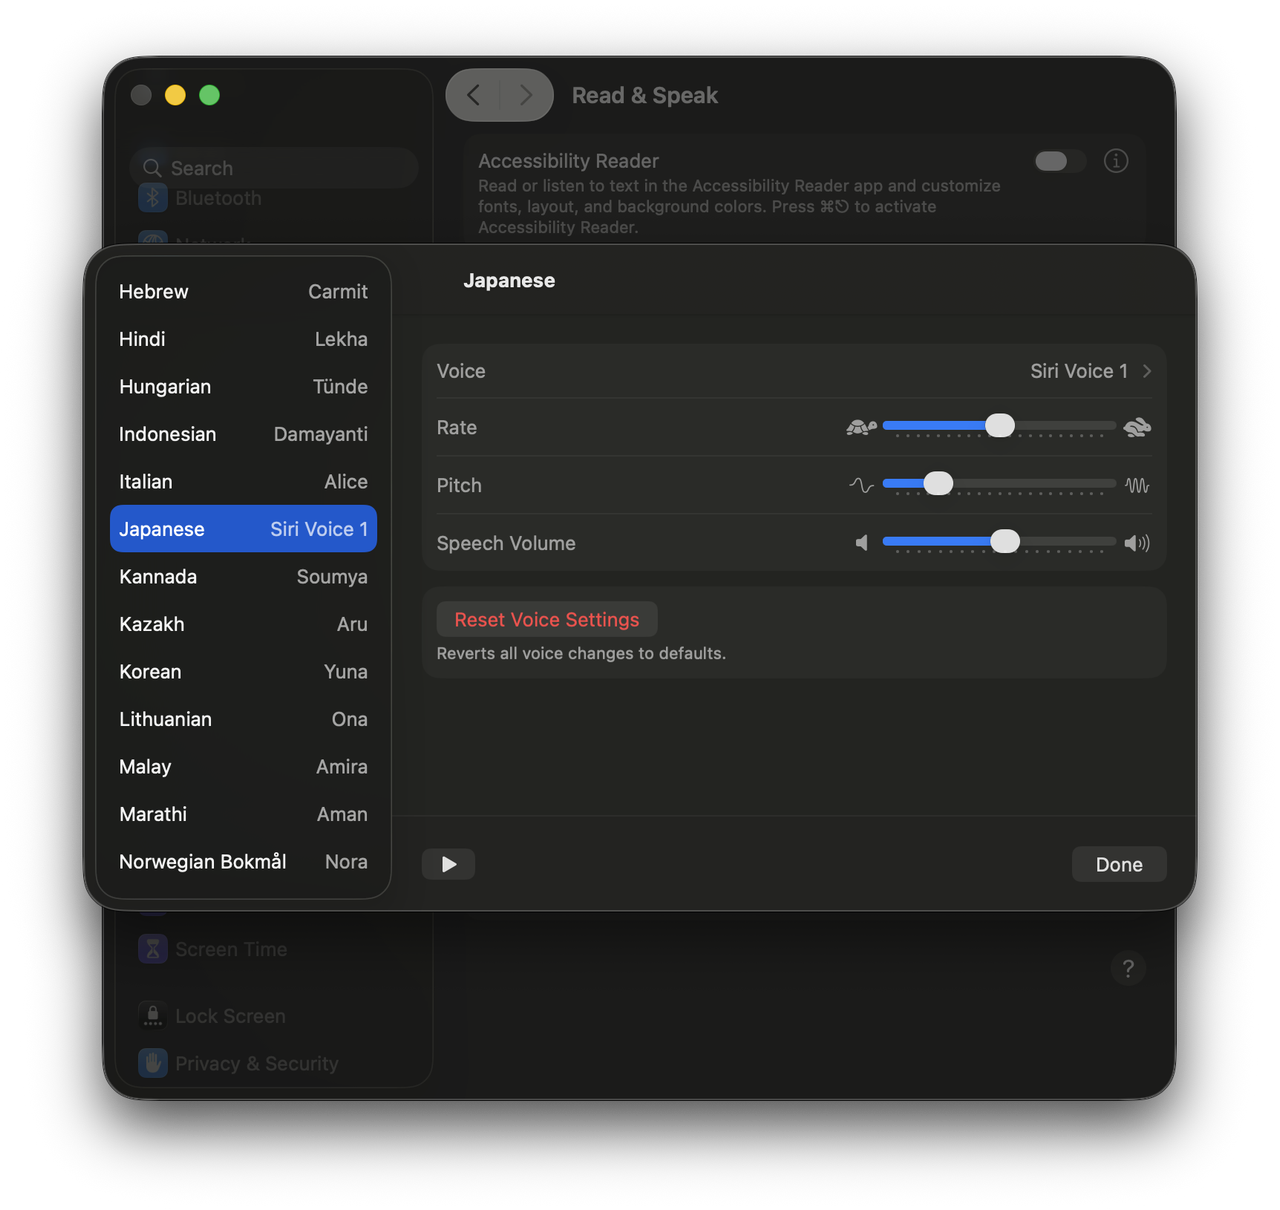
Click the System voice dropdown and select Manage Voices… (or the ⓘ icon).
-
Find Japanese in the list, and click Voice. You will see the available voice options, e.g.,
- Kyoko (Female, standard)
- Otoya (Male, standard)
- Siri Voices (Hattori and O-Ren, available in macOS 13+; Voice 1 and Voice 2, available in macOS 26)
There are “Enhanced” versions besides the standard ones, which give more natural pronunciation.
-
Click the download icon next to a voice and select it as the default voice for Japanese text.
Various ways of triggering TTS
Speak selection
You can set a keyboard shortcut to read any highlighted text on your screen:
- Go to System Settings > Accessibility > Read & Speak.
- Turn on Speak selection.
- Click the info (i) button next to it to set your preferred key combination
(default is often
Option + Esc). - Now you can let the system read out any text on your screen by selecting it and then pressing the shortcut.
Other settings:
- A controller will appear by default, which can be turned off by setting Show controller to Never.
- To read multilingual text properly you can turn on Detect languages.
Accessibility Reader
You can read all text on the active window in the Accessibility Reader:
- In Read & Speak, turn on Accessibility Reader.
- It uses the fixed key combination
CMD + Esc. - While focus on a window such as Notes, Chrome, etc., press the shortcut. The Accessibility Reader will open with the text in that window. If “Autoplay in Accessibility Reader” in the info icon is turned on, it can start to read right away.
Speak item under the pointer
This is useful if you want to use mouse only to trigger the TTS.
- In Read & Speak, turn on Speak item under the pointer.
- Move the cursor to the text and it will be pronounced immediately.
Using the say command in the terminal
Once a voice is installed, you can trigger it using the say command in your
Terminal:
say -v Kyoko "こんにちは、お元気ですか?"
List all available voices:
say -v '?'
-
for Japanese:
say -v '?' | grep ja_JP
Notes:
-
The
saycommand seems unable to detect languages automatically even if you’ve turned on Detect languages. Thus without-v Kyokoit doesn’t pronounce properly:say "こんにちは、お元気ですか?" -
Some voices can’t be found by
say -v '?', like Japanese → Siri → Voice 1, which sounds more natural and better than the enhanced voices like “Otoya (Enhanced)” IMO. Thus you can’t use those voices forsay. This is because Apple does not technically expose the modern Siri neural voices to the legacysaycommand-line utility.
How to save the speech
To save the speech as an audio file you can use one of the following methods.
Using the say command in the terminal
Save to an audio file:
say -v Kyoko "こんにちは、お元気ですか?" -o output.aiff
This is convenient but also limited since some voices can’t be used as previously stated.
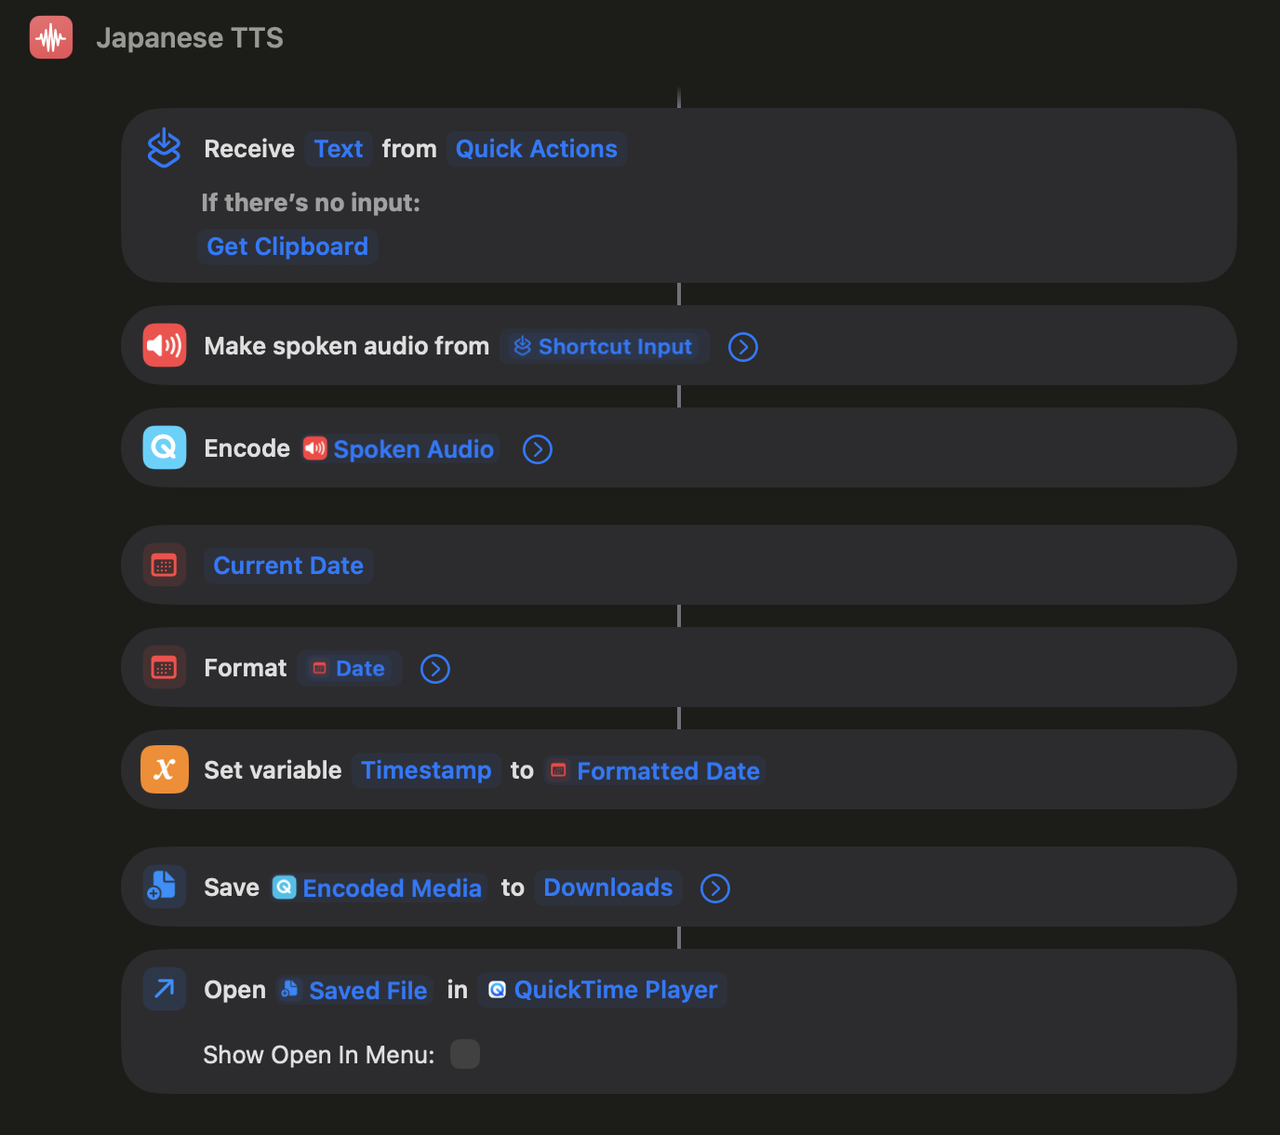
Creating a Shortcut
You can create a Shortcut by using the action “Make spoken audio from”:
Comments